Saturday, December 13, 2008

Configuration Internet using Speedy Modem Aztech

SPEEDY settings using ADSL2 + modem AZTECH

The first step

The first step first, of course, we logged on to the web configurationnya with the user and password setting the initial admin

Open IE Type http://192.168.1.1

loginmodem.GIF

The second step
I laginnya incorrect password or forget it and trusting one way to do the reset button behind the modem is small, if successful then proceed with selecting the new connection and hope it will be visible in the picture as follows:

  • and then enter a connection as a namenya
  • Select type pppoe
  • Encapsulation LLC
  • Fill with usernamenya also obtained from the telcom ditambah@telkom.net
  • do not forget the password
  • VPI is completed with 8
  • VCI is completed with 81

  • Please VPI and VCI values a confirmation in the back to the engineers in place SPEEDY you. Every place can vary.
  • others leave the default setting
  • Then we store the configuration it by pressing the button to submit
  • Then click the button how we let some time.
  • If all of the correct installation and configuration Splitter his internet connection so there is light nyalanya DSL and Internet yellow continuously.
Congratulations to try

Friday, December 12, 2008

General Tools (Resetter) for Canon Pixma iP1980

Canon PIXMA iP1980 Printer


Description

This product is known by another name: Pixma IP1980 Photo Printer

Spesifikasi:

Promo

None

Maximum Resolution (dpi)

4800(horizontal)*1 x 1200(vertical)

Print head / Ink

Smallest Ink droplet size

2pl

Ink

PG-830 (Pigment Black), CL-831 (Dye C/M/Y)
Optional ink cartridge: PG-40 (Pigment Black), CL-41 (Dye C/M/Y)

Ink Capacity Standard(approx. figure)

Color Document

PG-830: 215 sheets / CL-831: 206 sheets
Optional ink cartridge: PG-40: 327 sheets / CL-41:303 sheets

Photo (4" x 6")

PG-830: 1215 sheets / CL-831: 79 sheets
Optional ink cartridge: PG-40: 2110 sheets / CL-41:112 sheets

Print Speed

B/W document (Plain paper/New pattern)

21 ppm (A4 fast mode)

Color (plain paper/New pattern)

17 ppm (A4 fast mode)

Photo(A4, 8"x10" image)

Standard : approx. : 120 sec

Photo(4"x6", borderless)

Standard : approx. 55 sec

Printable Area

Borderless Printing

A4/Letter/8"x10"/5"x7"/4"x6"

Paper Size (Cut paper)

A4, Letter, Legal, A5, B5, Envelopes(DL, COM10), 4"x6", 4"x8", 5"x7", 8"x10"

Paper Handling

Rear tray (Plain paper)

Approx. 100

Interface

USB

Compatible OS

Windows2000 SP4/XP SP2,VISTA
Mac OS X 10.3.9-10.5

Dimensions

442 x 237 x 152mm (W x D x H)

Weight

3.3 kg

Power Source

AC100-240V 50/60Hz

Power Consumption

Standby: 1.0W
Off: 0.6W
Copying: 8W


Other

None

From the design Canon ip1980 is same as pixma ip1880. If there are some problems in ip1980 such as waste ink absorber full error you just remember General Tools (resetter)for Canon Pixma ip 1880. good luck

Sofware Reset Waste Ink Counter for Canon Pixma ip1980

Monday, December 1, 2008

Printer Epson Stylus photo C90


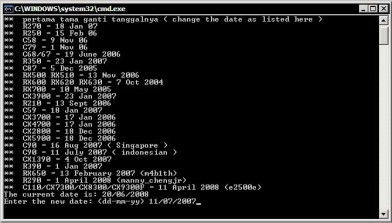
In outline steps me reset the Epson Stylus C90 and Epson Sylus C110 same, only different in the only change the date.

I. Step-step-me reset the Epson Stylus C90:

a.Make sure the printer is connected to the computer, turn on the printer.

b. Extracting resetter Epson Stylus C90.

c. Log in to the folder resetter Epson stylus_c90. Run reset.bat, a fox date 10/07/2007.

d.Reset.bat minimize the command prompt.

e.Run "AdjProg.exe."

f. Click the "Accept".

g. Click "Particular adjustment mode."

h. Then select Waste Ink pad Counter OK.

i. Click the "Check", wait until the process is completed.

j.Click the "initialization" then click "Finish".

k.Turn off the printer, and then on again.

l. after successfully reset, back to the command prompt reset.bat. Return the date as the original.

m.To ensure the printer C90 is normal, do the test print.


II. Step-step-me reset the Epson Stylus C110:

a. Make sure the printer is connected to the computer, turn on the printer.

b. Extracting resetter Epson Stylus C110.

c.Log in to the folder resetter_epson_c110. Run reset.bat, a fox date 11/04/2008.

d.Reset.bat minimize the command prompt.

e.Run "AdjProg.exe."

f. Click the "Accept".

g. Click "Particular adjustment mode."

h.Then select Waste Ink pad Counter OK.

i.Click the "Check", wait until the process is completed.

j. Klik tombol “Initialization” kemudian klik “Finish”.

k. Turn off the printer, and then on again.

l. After successfully reset, back to the command prompt reset.bat. Return the date as the original.

m. To ensure C110 printer is normal, do the test print.

Good luck.

Reset Canon ip1880 dan 1100 dan 2500


Dear all Friends

This is How to Reset Canon Pixma iP 1880 :
Waste Ink Counter Reset Manual for Service mode
1. Turn On iP1880
2. Push and Hold Resume button about 2 minutes
3. Release Resume button
4. Printer back to normal again

Sofware Download


Sunday, November 30, 2008

Canon IR5000 and IR6000 copiers service manual


This service manual may contain technical inaccuracies or typographical errors due to improvements or changes in products. When changes occur in applicable products or in the contents of this manual, Canon will release technical information as the need arises.

In the event of major changes in the contents of this service manual over a long or short period,Canon will issue a new edition of this manual.

Table of contents this Canon iR5000 and iR6000 Service Manual

1. System Unit
2. Reader Unit
3. Printer Unit
4. Troubleshooting
5. Appendix

Download Canon iR5000 and iR6000 Service Manual

Setting the Internet with the Nokia 2112 CDMA StarOne


HandPhone Nokia CDMA 2112, Data Cable DKU-5, use the card before it StarOne Card StarOne must diregister first to enable the Service Package Data StarOne.
type format: NET send to 799 will automatically get a reply from the same number, "Register PDSN successful. Data Package free service is active. "

1.Install the DKU-5 cable to the PC / laptop Driver Download

Run (double-click) setup.exe and will appear new InstallShield Wizard explorer press Next and Finish.Lalu cable DKU-5 with GSM and Computer, the Windows operating system XP will automatically appear Found New Hardware Wizard. Select the "Install the software automatically (Recommended)" click Next. The computer will find the new hardware is installed, and then click Continue

2.The installation of Nokia CDMA Modem Driver

Follow these steps: select Start> Control Panel and select System. Select the Hardware tab and select Device Manager.
Click Ports (COM & LPT), if the Port 1 on the Nokia Adapter indicates COM5 at the time of the super COM5 also select a modem. Each computer will use COM different. In some computer COM port that is used will always change if we release the data cable from the computer.
And the next one to the installation modem. Download the file modem driver nokia "click here". Open the Control Panel and select Phone and Modem Options. There are three options tab: Dialing Rules, Modem and Advanced. Choose the Modem tab and press the Add menu. Will appear explorer new Add / Remove Hardware wizard and check Do not detect my modem and then select Next. In the Install New Modem explorer select Have Disk and then click Browse. I browse the files "nmpCDMA2000_1x.inf." OK> select Nokia CDMA 2000 1x 3G Packet Data Modem and click Next. Select the COM port with the same detected in the device manager, and then click Next. And will appear explorer Hardware Installation. Choose Continue Anyway. Installation of Modem finished click Finish.

Making a connection to the Internet
Log in to the Control Panel and select Network Connection, and click on the Create a New Connection. Will appear explorer Welcome To The New Connection Wizard and click Next> Select Connect to the Internet and then click Next> Select Set up my connection manually and then click Next> Select Connect Using a dial-up modem and click Next> Select Modem Nokia CDMA2000 1x ago click Next> Type in the naming of the ISP Name: for example, "NokiaStaroneCDMA" and then click Next> Dial In Phone Number type: # 777 and then click Next> Enter the user name and password in accordance with the service. For StarOne
User Name : starone
Password : indosat
and then click Next> click to add a shortcut and click Finish

Dial Internet
Click the shortcut "NokiaStaroneCDMA" will appear a new explorer. Fill in the password that is usually empty. Click Anyone who use this computer and Dial

Tuesday, May 13, 2008

What is Linux ?

Linux is an open source program that is free under the GNU license, 32-64 bit operating system, which is a derivative of Unix and can be run on many different hardware platforms from Intel (x86), to the RISC processor. Linux open-source programs as the free one that makes Linux is popular because it's free. With the GNU license (GNU Not Unix) you can get the program, complete with source code (source code). Not only that, you are given the right to copy as much as you want, or even change the code sumbernya.Dan that all legal under license. Although free, the GNU license to allow the parties want to attract cost for multiplication and delivery program. Full license from the GNU, you can read in Appendix III. GNU license translation into Bahasa Indonesia, the book is still done.

Note:

Literature about the complete GNU you can read in their web sites, namely http://www.gnu.org.

Thus, it can be said that you can get Linux, without having to pay at all. If you must pay each time you install the software on another computer, then with Linux you can install anywhere without having to pay license.

Freedom of the most important of Linux, especially for a programmer and network administrator, is the freedom to obtain the source code (source code) and the freedom to change it. This is for the several important issues. First, security, the second dynamics.

If commercial software does not allow you to know the code sumbenya then you will never know whether the programs that you buy from them is safe or not (often called security by obscurity). Your life in the hands of the vendor. And if there is a notice about the bug from commercial software is often already too late. With Linux, you can examine the source code directly, along with other Linux users. The development of Linux users as a community that is open, make the bug will be known quickly, and as soon as is also the programmer will improve the program. You also determine that the code of the match in accordance with the hardware and basic software to be implemented. Like a car, you can modify they can, even though the engine, to obtain the desired form.

Openness source code also allows the operating system grew rapidly. If a program with the system closed and only developed by a particular vendor, at most about a thousand to five thousand people. Meanwhile, Linux, the openness with the source code, developed by volunteers all over the world. The bug is known more quickly and penambalnya program (patch) more quickly available. Approach to the development of this operating system called Bazaar. Kebalikannya system Chatedraal very closed and only centered on one or two developers only.

In addition, Linux provides a programming language for free, complete with kompilernya, and the program pembantunya. Some of them are:

* THERE
* BASIC
* C
* C + +
* Expect
* FORTRAN
* GTK, to create GUI applications on Linux
* Pascal
* Phyton
* Shell Scripts
* TCL
* Perl (The Practical extraction and Report Language), often used to create CGI scripts on the web.

source: http://sdn.vlsm.org/share/ServerLinux/node11.html

Install the application squid

The steps that I do:

1. Install the application squid
2. Edit the configuration file squid
3. Create a directory and files to blacklist blacklists manually
4. Create a directory and file for error messages in english
5. Check the firewall configuration is applied in the proxy
6. Run Services
7. Test configuration in the proxy and client

Squid configuration file: / etc / squid / squid.conf (my version)

# Squid 2.6.STABLE12
# Author by http://fxekobudi.net

OPTION # NETWORK
# --------------------------
http_port 3128
icp_port 0

OPTION # size of the cache
# --------------------------
cache_mem 256 MB
cache_swap_low 94
cache_swap_high 96
maximum_object_size 16,384 KB
minimum_object_size 4 KB
maximum_object_size_in_memory 2048 KB
fqdncache_size 1024
cache_replacement_policy heap GDSF
memory_replacement_policy heap GDSF

LOG # DIRECTORY and cache
# --------------------------
cache_dir aufs / var / spool / squid 9000 16 256
access_log / var / log / squid / squid access.log
cache_log / var / log / squid / cache.log
cache_store_log none

Tuning # Proxy Cache
# --------------------------
refresh_pattern ^ ftp:1440 20% 10,080
refresh_pattern ^ gopher: 1440 0% 1440
refresh_pattern. 0 20% 4320
negative_ttl 1 hour

# Times
# --------------------------
half_closed_clients off
# -------------
# Block forbidden sites (blacklists) manually
# -------------
acl noblacklist dstdomain "/ etc / squid / blacklists / no-blacklist.txt"
acl katablacklist url_regex-i "/ etc / squid / blacklists / word-blacklist.txt"
acl domainblacklist dstdomain "/ etc / squid / blacklists / domain-blacklist.txt"
acl ipblacklist etc. "/ etc / squid / blacklists / ip-blacklist.txt"

acl tdkbebasdownload time, 08:00-13:00

# ACCESS CONTROL
# --------------------------
acl all src 0.0.0.0/0.0.0.0
acl manager proto cache_object
acl localhost src 127.0.0.1/255.255.255.255
acl to_localhost etc. 127.0.0.0 / 8
acl SSL_ports port 443
acl Safe_ports port 80 # http
acl Safe_ports port 21 # ftp
acl Safe_ports port 443 # https
acl Safe_ports port 70 # gopher
acl Safe_ports port 210 # WAIS
acl Safe_ports port 1025-65535 # unregistered ports
acl Safe_ports port 280 # http-mgmt
acl Safe_ports port 488 # gss-http:
acl Safe_ports port 591 # filemaker
acl Safe_ports port 777 # multiling http
acl CONNECT method CONNECT
# -------------
Listing # IP address
# -------------
acl lab1 src 192.168.254.1-192.168.254.40/255.255.255.255
acl staff-it src 192.168.254.41-192.168.254.42/255.255.255.255
acl lab2 src 192.168.254.43-192.168.254.44/255.255.255.255
acl ruang1 src 192.168.1.1-192.168.1.8/255.255.255.255
acl ruang2 src 192.168.1.11-192.168.1.17/255.255.255.255

# -------------
# Block forbidden sites manually
# -------------
http_access allow noblacklist
http_access deny katablacklist
http_access deny domainblacklist
http_access deny ipblacklist

http_access allow manager localhost
http_access deny manager
# -------------
Rule # I apply
# -------------
http_access allow lab1
http_access allow staff-it
http_access allow lab2
http_access allow ruang1
http_access allow ruang2

acl magic_words2 url_regex-i ftp. exe. mp3. vqf. tar.gz. gz. tar.bz2 suffix. bz2. rpm. zip. rar. avi. mpeg. mpe. mpg. qt. ram. rm. raw. wav. iso

# Cancel the download if the file is bigger than 2 MB = 2000 × 1024 bytes = 2048000 bytes
reply_body_max_size 2048000 allow magic_words2 tdkbebasdownload

http_access deny! Safe_ports
http_access deny CONNECT! SSL_ports
http_access allow localhost
http_access deny all
http_reply_access allow all
icp_access allow all

# Parameters ADMINISTRATOR
# --------------------------
cache_mgr fxekobudi@gmail.com
cache_effective_user squid
cache_effective_group squid
visible_hostname proxy.fxekobudi.local

# ERROR MESSAGE IN ENGLISH
# --------------------------
error_directory / usr / share / squid / errors / English

So that the blacklists that can be used manually, make the directory containing the files mentioned in the manual blacklists:
# Mkdir / etc / squid / blacklist
# Cd / etc / squid / blacklist /
# Vim no-blacklist.txt
# Vim word-blacklist.txt
# Vim domain-blacklist.txt
# Vim ip-blacklist.txt
Minimal included one item for each file, because if not, then when we see the error log squid shortly after the service starts, there will be an error not find the item in the file ...

In addition, I also include a configuration error message to the squid proxy in the form of english, so that users in the work place more easily understand my intent ... The idea of this error message and then when I became an inspiration to configure redirect SquidGuard to lead to a file that would make the the root directory of the web server.
To do so, just stay copykan Error messages in English to the location of the error message in Indonesian.

# Cp / usr / share / squid / errors / English / usr / share / squid / errors / English

Sure translate the file-file ...

Solutions to run, just use the command:

# / Sbin / service squid start

Oh yes, you also need to add in the firewall configuration using Iptable that the client is allowed access to the Internet through a proxy, the client requests to the proxy with the IP address listed is allowed through the port 3128 (or 8080) depending on the configuration that you use ... so I remember the first time try, internet connection in the proxy server packing a road, but the shuttlecock clientnya everybody can access, so I actually had a client has not been allowed access to the IP address and the proxy portnya ... Boo. To be able to access the proxy, rule iptable it to / etc / sysconfig / iptables should include this rule: (I use the default firewall configuration Fedora Core)
A-RH-Firewall-1-INPUT-m state-state NEW tcp-m-p tcp-dport 3128-j ACCEPT

To apply the IP forwarding, I edit the file / etc / sysctl.conf and give value 1 (enable) to direktive:
net.ipv4.ip_forward = 0 become net.ipv4.ip_forward = 1

Saturday, April 19, 2008

Setting Modem Nokia CDMA 2115i

Getting Started

Instalasi Kabel Data DKU-5 dan Modem Nokia 2115i/2116
Anda harus terlebih dahulu memiliki kabel data DKU-5:

1. Masukkan CD Instalasi DKU-5 dari Nokia(jangan hubungkan ponsel dengan USB komputer terlebih dahulu)2. Pilih Instalasi Driver DKU-5
3. Hubungkan Handset dengan port USB
4. Saat ada pesan “found new hardware” dan ditanyakan drivernya,
pilih detect automatically (CD DKU-5 tetap harus berada di CD ROM)
5. Kabel DKU-5 telah terinstall di PC Anda

Instalasi Driver Modem Nokia 2115iDownload file Modem Driver untuk Nokia 2115i (nmpCDMA2000_1x.inf).

1. Pilih Program > Control Panel > Phone and Modem Options
2. Pilih tab Modem, klik Add
3. Check “Dont’ detect my modem”
4. Pilih “Have Disk”
5. Saat ditanyakan, cari lokasi dimana Anda menyimpan file nmpCDMA2000_1x.inf
yang telah Anda download, klik OK
6. Pilih “3G packet Modem”
7. Pilih Port yang paling besar (jangan pilih all ports)
8. Modem Nokia telah terinstall di PC Anda
9. Buat Koneksi Internet baru dengan memilih Nokia 3G packet data sebagai modem

Cara Membuat Koneksi Internet Baru

1. Pilih Program > All Programs > Accessories > Communications > Network Connections
2. Pilih File > New Connections
3. Klik Next, pilih “Connect to the Internet”
4. Pilih “Set up My Connection manually”
5. Pilih “Connect using a dial-up modem”
6. Pilih handset yang ingin Anda gunakan sebagai modem (Nokia)
7. Masukkan nama provider CDMA (Mobile-8/StarOne/Esia) sebagai nama ISP Anda
8. Masukkan #777 sebagai nomor dial up ISP
9. Pilih Anyone’s use untuk koneksi ini
10. Masukkan m8 sebagai username dan password untuk Fren,
username: starone dan password: indosat untuk StarOne,
esia sebagai username dan password untuk Esia
11. Check “Add Shortcut”, klik “Finish”
12. Connect ke Internet menggunakan koneksi Mobile-8/StarOne/Esia yang telah Anda buat

Setting Internet HP Nokia 2865

Getting Started

HP Nokia 2865 support koneksi via bluetoots dan InfraRed, dan
Laptop butut toshiba TE2000 suport InfraRed
berikut adalah langkah demi langkah yang dilakukan
untuk menkoneksikan HP Nokia dengan Komputer.

1. Aktipkan fitur koneksi InfraRed di HP Nokia 2865,
cara mengkatipkan
Setting--->connectivity--->Infrared--->Select

2. Setelah InfraRed kita aktipkan,
letakan HP dekat dengan InfraRed Laptop, kemudia OS akan mendeteksi
kalau ada interface baru dan akan muncul windows dialog new hardware wizard,
pilih install secara otomatis dan ikuti langkah langkah installasi sampai selesai.

3. Hardware yang barusan kita install akan dideteksi sebagai modem,
selanjutnya kita harus setting modem tsb

4. Click start--->Control Panel--->Phone and Modem (doble click),
Akan muncul windows dialog Phone and Modem Option

5. Click Modems dan pilih Standard Modem over IR link kemudian
click properties

6. Click Diagnostic--->Click Query Modem, maka modem
dan laptop akan saling komuniasi.

7. Click Advanced, pada colom Extra Setting, isikan
Extra initialization command dengan :
+crm=1;+cso=33 atau +crm=1;+cps=33;+cmux=1;+cta=0 setelah itu click OK

8. Bikin dial-up networking, click start--->connect to--->show all connection
9. Create New Connection dan akan muncul New Connections Wizard dan click next
10. Pilich connect to the internet, click next
11. Pilih setup my connection manualy
12. Pilih Connect using dial-up modem, kemudian click nect
13. Pilih Modem Standard Modem over IR link (COM5) kemudian click next
14. Isi ISP Name misal belogFlexy kemudian click Next
15. Isi phone number dengan #777
16. Masukan username dan password,
dalam hal ini usernya adalah telkomnet@flexi dan passwornya telkom,
kemudian click next
17. Click Finish dan selamat anda telah sukses, sekarang tinggal coba untuk
dial untuk mencoba internet via hp n flexi


Setting Modem Nokia CDMA

Instalasi Kabel Data DKU-5 dan Modem Nokia 2115i/2116
Anda harus terlebih dahulu memiliki kabel data DKU-5:

1. Masukkan CD Instalasi DKU-5 dari Nokia
jangan hubungkan ponsel dengan USB komputer terlebih dahulu)
2. Pilih Instalasi Driver DKU-5, tunggu hingga proses instalasi selesai
3. Hubungkan kabel data DKU-5 pada port USB
4. Saat ada pesan “found new hardware” dan
ditanyakan drivernya, pilih detect automatically
CD DKU-5 tetap harus berada di CD ROM)
5. Kabel DKU-5 telah terinstall di PC Anda
6. Install driver modem Nokia

Instalasi Driver Modem Nokia 2115i/2116
Download file Modem Driver untuk Nokia 2115i/2116 (nmpCDMA2000_1x.inf)

1. Pilih Program > Control Panel > Phone and Modem Options
2. Untuk instalasi modem yang pertama kali
akan muncul window Location Information
(isi data2 yang diminta sesuai lokasi anda, cukup isi Area code)
3. Pilih tab Modems, klik Add…
4. Check “Dont’ detect my modem;…”
5. Pilih “Have Disk…”

6. Saat ditanyakan, cari lokasi
dimana Anda menyimpan file nmpCDMA2000_1x.inf
yang telah Anda download, klik OK.
7. Pilih “Nokia CDMA2000 1x 3G Packet Data Modem”
8. Pilih Port yang paling besar (jangan pilih all ports)
9. Modem Nokia telah terinstall di PC Anda
10.Buat Koneksi Internet baru dengan memilih Nokia 3G
packet data sebagai modem

Cara Membuat Koneksi Internet Baru

1. Pilih Program > All Programs > Accessories > Communications > Network Connections
2. Pilih File > New Connections
3. Klik Next, pilih “Connect to the Internet”
4. Pilih “Set up My Connection manually”
5. Pilih “Connect using a dial-up modem”
6. Pilih handset yang ingin Anda gunakan sebagai modem (Nokia)
7. Masukkan nama provider CDMA (Mobile-8/StarOne/Esia) sebagai nama ISP Anda
8. Masukkan #777 sebagai nomor dial up ISP
9. Pilih Anyone’s use… untuk koneksi ini
10. Starone :
username: starone
password: indosat

Mobile-8 : username: m8
password: m8,

Esia : username: esia
password: esia

Flexi : username: telkomnet@flexi
: password: telkom

11. Check “Add Shortcut”, klik “Finish”
12. Connect ke Internet menggunakan koneksi Mobile-8/StarOne/Esia yang telah Anda buat

Berikut ini perbandingan tarif koneksi internet (prabayar):
Indosat (StarOne): *tarif termurah*
- Time based, Rp 75 / menit
- Volume based, Rp 1 / kb
tarif berlaku mulai 20 November 2007

Mobile-8 (Fren): *mobilitas tinggi*
- Time based via ISP, Rp 160 / menit
- Volume based, Rp 6 / kb

Bakrie Telecom (Esia): *tarif kompetitif*
- Time based, Rp 125 / menit
tarif berlaku mulai 1 November 2007

Telkom (Flexi): *jaringan luas*
- Volume based, Rp 5 / kb
- Time based, akses ke telkomnet@instan (080989999), tarif sesuai yang berlaku

Links:-
- Driver modem nokia (OS: Windows 2000/XP) : download (Klik kanan, Save Target As… atau Save Link As…)

Saturday, March 29, 2008

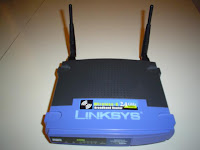
Setting Linksys WRT54G Router as a Gateway


Linksys WRT54G dwe can make the server as a gateway for Internet connection that we have, we may have to provide the server pc so that the cost should we provide will be more expensive. For configuration WRT54G This is not too difficult. The steps: If you choose to disable the DHCP then you must enter the IP, Netmask, Gateway and DNS manually for each client.


Setting the IP WAN & LAN
  • Turn Linksys Router WRT54G.
  • By using the UTP cable that has been provided (Straight cable UTP) cable to plug in a computer or notebook while in the Router port to plug in a LAN.
  • Set the IP in the computer / notebook into a DHCP and will usually get the IP automatically from the Router.
  • Then see the IP obtained by the computer / notebook.
  • using a browser, the browser address bar enter the ip gateway computer (usually 192.168.1.1 router from the default).
  • Then, the window appears that asks to enter a password access, the default user and password: Admin
  • In the Internet Connection Type select the appropriate connection with the use (depending on the ISP): DHCP or Static.
  • In baguan Network Setup, Silence They Cry LAN we can select according to the needs of our desire or whether static or DHCP. if we select static, we must fill the IP Address. Netmask, gateway and DNS in manual.
  • Time Zonenya choose GMT +7 to Indonesia and then to the save.
  • and then the Save Settings.
  • until then here's Router is ready to connect to the Internet, live UTP cable from the device connected to the Internet port to plug in our WAN.
Wireless Settings
  • entrance to the Wireless Menu
  • Wireless network options select a Mixed mode.
  • SSID and then write the appropriate willingness we (can nickname, address, name or anything that)
  • Wireless Channel selected default, except when in the vicinity of our many wifi / hotspot that can be offending connection (from the experience of this device Keep me from the device because it often disrupt indovision)
  • and then the Save Settings.
Wireless connection to secure, then we live security.Tipe install security we can use WEP or WPA. but the habitat of many who choose a 64 bit WEP.

How the Security Wireless configuration:
* Menu Wireless
* And then select the WEP security mode
* Transmite key to select a default 1 (which may also other)
* WEP Encryption select 64 bits with 10 hex digits
* Type in the passphrase and click generate, will appear 4 key wifi to access your password, please use the
Key 1, (if we choose defaul transmitenya = 1).
* Save SettingsSo now REDE Wireless Router is used for both cable and wireless and wireless have security / security.

Congratulations to try it .... cause the device to the wireless router also setingannya other more or less the same ampir.

When we have other servers in the network from LAN Router, and we want the server can diremote from outside the network, then we can activate functions porrt forwarding, or DMZ.

Thursday, March 27, 2008

Wireless LAN

Definition: WLANs provide wireless network communication over short distances using radio or infrared signals instead of traditional network cabling.
A WLAN typically extends an existing wired local area network. WLANs are built by attaching a device called the access point (AP) to the edge of the wired network. Clients communicate with the AP using a wireless network adapter similar in function to a traditional Ethernet adapter.

Network security remains an important issue for WLANs. Random wireless clients must usually be prohibited from joining the WLAN. Technologies like WEP raise the level of security on wireless networks to rival that of traditional wired networks.

wireless LAN
Examples: For WLANs that connect to the Internet, Wireless Application Protocol (WAP) technology allows Web content to be more easily downloaded to a WLAN and rendered on wireless clients like cell phones and PDAs.


WLAN standards

WLAN standards below the metropolitan level are fairly well defined; most people have heard about 802.11b and g Wi-Fi standards. Some upcoming standards like 3G are attempting to increase range and seamless availability. Others like 802.1x, EAP, and 802.11i are attempting to increase security. Currently, the industry emphasis is on extending range or strengthening security rather than trying to increase speed, but that may change in the future.

802.11a, b, and g: The big three standards
The 802.11a, b, and g standards are by far the most common ones for home wireless access points up through large business wireless systems. The differences in the protocols are these:

802.11a
- Shortest range of the big three standards (generally around 60 to 100 feet)
- Broadcasts in the 5GHz frequency
- Supports up to 54Mbps (megabits per second) speed
- Less able to penetrate physical barriers like walls
- Better speed than 802.11b, supports more simultaneous connections, and because it operates in a more regulated frequency, gets less signal interference from other devices, so is considered to be more consistent in terms of maintaining a connection. In certain circumstances, such as areas with major radio interference (e.g., airports, business call centers), 802.11a will outperform and actually outrange 802.11b.

802.11b
- Better range than 802.11a: up to 300 feet in ideal circumstances, and better than 802.
11a even in real-world circumstances (Tests by independent reviewers tend to achieve
anywhere from 70 to 150 feet.)
- Broadcasts in the 2.4GHz frequency
- Supports up to 11Mbps speed
- Hardware tends to be lower in cost nowadays.
- Better able than 802.11a to penetrate physical barriers, and lower in cost, but cannot support as many simultaneous connections. Also, it operates on the same frequency as many cordless phones and other appliances; therefore, it is more susceptible to interference and other things that degrade its performance, so it's not considered a good technology for certain applications requiring absolutely reliable connections, such as live video streaming.

802.11g
- Very close to 802.11b in certain aspects; is actually backwards compatible with 802.11b
products (but will run only at 802.11b speeds when operating with them)
- Faster speed than 802.11b; supports up to 54Mbps. Some proprietary solutions (Netgear,
Linksys) manage to get 108Mbps out of the 802.11g standard by broadcasting on more than
one of the eight channels that 802.11b uses.

- Also uses the 2.4GHz frequency
- Slightly shorter range than 802.11b, but still better than 802.11a. Most independent reviews
report around 65 to 120 feet in real-world situations.
- Suffers from the same problems, such as interference and absolute reliability, as 802.11b

Wi-Fi - Wireless

Definition:
Wi-Fi is the industry name for wireless LAN (WLAN) communication technology related to the IEEE 802.11 family of wireless networking standards. To some, the term Wi-Fi is synonymous with 802.11b, as 802.11b was the first standard in that family to enjoy widespread popularity. Today, however, Wi-Fi can refer to any of the established standards: 802.11a, 802.11b, 802.11g and 802.11n.
The Wi-Fi Alliance (see sidebar) certifies vendor products to ensure 802.11 products on the market follow the various 802.11 specifications.

Unfortunately, 802.11a is not compatible with 802.11b/g, so the Wi-Fi market remains somewhat fragmented.

Wednesday, February 27, 2008

LAN - Local Area Network

If you're curious about networking, this primer will provide an introduction to Local Area Networks. For a discussion of network terminology, see Network Introduction.A Local Area Network (LAN) is a high-speed communications system designed to link computers and other data processing devices together within a small geographic area, such as a workgroup, department, or building. Several LANs can also be interconnected within a campus of buildings to extend connectivity (also called a Wide Area Network or WAN). This allows users to electronically share vital computing resources, such as expensive hardware (e.g. printers and CD-ROM drives), application programs, and information.Local Area Networks implement shared access technology. This means that all of the devices attached to the LAN share a single communications medium, usually a coaxial, twisted-pair, or fiber-optic cable.A physical connection to the network is made by putting a network interface card (NIC) inside the computer and connecting it to the network cable. Once the physical connection is in place, the network software manages communications between stations on the network.To send messages to and from computers, the network software puts the message information in a packet. (If the message to be sent is too big to fit into one packet, it will be sent in a series of packets.) In addition to the message data, the packet contains a header and a trailer that carry special information to the destination. One piece of information in the header is the address of the destination.The NIC transmits the packet onto the LAN as a stream of data represented by changes in electrical signals. As it travels along the shared cable, each NIC checks its destination address to determine if the packet is addressed to it. When the packet arrives at the proper address, the NIC copies it and gives its data to the computer. Since each individual packet is small, it takes very little time to travel to the ends of the cable. After a packet carrying one message passes along the cable, another station can send its packet. In this way, many devices can share the same LAN medium.Each LAN has its own unique topology, or geometric arrangement. There are three basic topologies: bus, ring, and star. Most LANs are a combination of these arrangements.

In a bus topology all of the devices are connected to a central cable or backbone.


In a ring topology the devices are connected in a closed loop so that each device is connected to two others, one on either side. This kind of topology is robust; that is, one device's failure will probably not cause total network failure.


In a star topology the devices are all connected to a central hub, which forwards data towards its final destination. The NCI-Frederick LAN infrastructure is standardized on the star topology. If the data's destination is within the local star segment, the hub will forward data directly to the destination device; if the data's destination is outside the local star segment, the hub forwards the data to a router


Depending on the topology and media that are used, as well as the protocols (formats for transmitting data) that are implemented, a LAN can permit data transfer rates of up to 100 Million bps.For more information about networks, including a description of the NCI-Frederick's network

Wednesday, February 20, 2008

Internet Connection Sharing

Internet connection sharing (ICS) describes the ability of a network of two or more computers to share a single Internet connection. Internet connection sharing can be used at home to share a high-speed DSL or cable connection with all computers in the household. It is also utilized by businesses to provide Internet access throughout a network using a single Internet account.


The ability to set up Internet connection sharing has been built into Microsoft Windows operating systems since Windows 98 Second Edition (SE). ICS is usually only used with a high-speed Internet connection, as two simultaneous users, for instance, use twice the bandwidth resources. A dial-up modem connection slows considerably when accessed by multiple persons.
Networks can be configured several different ways. In general, however, Internet connection sharing requires Ethernet cards in each computer, a hub or switch, and a router. There are high-speed DSL and cable modems available that have the router and switch built-in. These are extremely convenient for connection sharing.


A connection sharing network can be wired or wireless. If wired, coaxial cable will be required to run from the main computer to the network hub or switch, and from there to each of the computers that are to be part of the network. Businesses often prefer wired networks because they are generally faster and easier to secure than wireless networks. Householders often prefer wireless networks because they are more convenient, cleaner, and easier to install. Also, one can move about the house with a laptop and still enjoy Internet access without being tethered to the network.
It is important to decide on a wired or wireless network before purchasing equipment. Though many brands of wireless switches also have rear ports for optional coaxial wires, the opposite is not true. A wired network switch will not support a wireless network. Each Ethernet card will also have to be wired or wireless, in accord with the network's design.

Internet connection sharing is a great way to save money by avoiding multiple ISP accounts, while providing convenient Internet access throughout the home or office. Directions for setting up Internet connection sharing are available online or in the Help menu of most operating systems.

Tuesday, February 19, 2008

Setting koneksi internet GPRS dialup menggunakan hp di Ubuntu

Getting Started

Melakukan setting koneksi internet dialup dengan handphone anda
sebagai modem di Ubuntu adalah mudah. Berikut adalah langkah-langkahnya

1. Siapkan device yang diperlukan
Siapkan Handphone anda ( yang mendukung GPRS dan modem dialup )
serta kabel data (jika menggunakan).
Dalam hal ini saya menggunakan HP Nokia 6020 dengan Kabel Data DKU-5 / CA-42

2. Pastikan semua device anda telah terpasang
Pasangkan kabel data anda dengan HP dan PC anda.
Pastikan bahwa kabel data telah terpasang dengan benar baik di PC anda maupun HP anda.

3. Buka Terminal
Buka Terminal melalui Application > Accesories > Terminal

4. Ketikkan “sudo wvdialconf” di Terminal
Perintah ini akan mendeteksi secara otomatis konfigurasi
modem yang telah anda pasang.

5. Masuk ke direktori /etc dengan mengetikkan “cd /etc”.
6. Edit wvdial.conf dengan mengetikkan “sudo gedit wvdial.conf”.
7. Tambah APN, user dan password yang anda punya ke dalam wvdial.conf.
8. Simpan wvdial.conf dengan menekan tombol Ctrl+S pada Text Editor.
9. Keluar dari Text Editor.
10. Ketik “sudo wvdial” pada Terminal dan jika setting telah
benar maka dalam beberapa saat anda telah terhubung ke internet.

Sunday, January 20, 2008

Setting Up Outlook Express

This tutorial shows you how to set up Microsoft Outlook Express 6 to work with your e-mail account. This tutorial focuses on setting up Microsoft Outlook Express 6, but these settings are similar in other versions of Microsoft Outlook Express. You can set up previous versions of Microsoft Outlook Express by using the settings in this tutorial

To Set Up Your E-mail Account in Microsoft Outlook Express
1. In Microsoft Outlook Express, from the Tools menu, select Accounts


2. Go to the Mail tab and from the Add menu, select Mail.


3. In the Display Name field, enter you full name and click Next.

4. In the E-mail address field, enter your email address and click Next.

5. On the E-mail Server Names page, enter your information as follows:

My incoming mail server is a
Select POP3.

Incoming mail (POP3, IMAP or HTTP) server
Type pop.secureserver.net.

Outgoing mail (SMTP) server
Type smtpout.secureserver.net.


Click Next.


smtpout.secureserver.net" is an SMTP relay server. In order to use this server to send e-mails, you must first activate SMTP relay on your e-mail account. Log on to your Manage Email Accounts page to set up SMTP relay. If you do not have SMTP relay set up and your Internet Service Provider (ISP) allows it, you can use the outgoing mail server for your Internet Service Provider. Contact your Internet Service Provider to get this setting.

6. In the Account Name and Password fields, enter your email address and password, and then click NextIn .


7. On the setup confirmaiton page, click Finish.


8. On the Mail tab, select the account you just created and then click Properties.


9. Go to the Servers tab.
10 Select My server requires authentication, and then click Apply.


11. Go to the Advanced tab.
12. In the Server Port Numbers section, change Outgoing mail (SMTP) to 80, and then click OK.


13 (Optional) If you would like to keep a copy of your email messages stored on your email provider's servers, in the Delivery section, select Leave a copy of messages on server.

Your Outlook Express account is now set up. Click Close to close the Internet Accounts window and return to your Outlook Express.

Saturday, January 19, 2008

Setting Dial-up Windows XP


Getting Started
1. Go to the Control Panel from the Start Menu


2. From the Control Panel double click on the Network Connections icon


3. From the Network Connections window click on the Create a new connection link on the left side of the window


New Connection Wizard
4. When you click on the Create a new connection link the
New Connection Wizard will start. Click the Next button to begin


5. Make sure the Connect to the Internet option is selected and click the Next button


6.On the next screen select the Set up my connection manually option and click the Next button


7. On the next screen select the Connect using a dial-up modem option and click the Next button


8.On the next screen you will br prompted to enter a name for the dial-up connection. You can name this connection anything you wish (e.g. TAMU or INTERNET). After you have entered your connection name click the Next button


9.On the next screen you will be prompted for the phone number for the ISP. Enter 8623800. Click the Next button


10. On the next screen you will see an option that will allow you to limit access to this dial-up account. It is up to you which option you select but please note that if you choose My use only, other users on your system will not be allowed to use this dial-up account. After you have selected one option click the Next button


11.On the next screen you will be prompted to enter your username and password. Your username and password will be your Net-ID and Net-ID password. After you have entered your information click the Next button


12.The next screen is the last screen of the New Connection Wizard. You may check the Add a short-cut to my desktop box if you like. We do recommend this as it is easier to find on the desktop than in the Network Connections folder. Click the Finish button to finish and exit the wizard


Connecting to the Internet
To connect to the Dial-up service, double-click on the short-cut to the dial-up account and click Dial

www.klinik-printer.com